Photographers return with hundreds of photographs at the end of a day's shoot. On longer trips, there are
thousands of photos to transfer to the computer upon return, which then need to be organized for easy
finding, selecting favorites, marking them for editing, backing up, and finally publishing. This whole
process is known as the "workflow". Actually, the workflow starts even before taking the photo,
beginning with setting the camera settings. This workflow changes over time with evolving technology,
software, and cameras. Each photographer has their unique method. In this article, I will try to explain
my own workflow process.
Since I started photography as a hobby in 2004, I have taken thousands of photos. As of writing this
article, the count has reached 118,664, and I continue to add more each day. I prefer shooting in RAW
format for the greater editing flexibility it offers. In this case, a single RAW file taken with my
current Canon 5D Mark IV camera is about 40 MB in size. The alternative is shooting in JPEG format,
which reduces file size to around 8-10 MB, but significantly limits post-editing capabilities. When
shooting in JPEG, the camera processes the photo for you based on the selected settings, converting it
from RAW to JPEG, whereas RAW files must be processed with software, not used in their current state.
This also impacts the workflow. Thus, the decision to shoot in RAW or JPEG shapes the workflow.
An unprocessed RAW photo. Dark areas are very dark, details
are lost, the light in the bright window part is blown out, and the colors are dull.
The photo after processing the RAW file into JPEG format.
Dark areas are brightened, details in the blown-out window part are visible, and the colors are vibrant.
Given this situation, storing photos on a standard desktop or laptop
hard drive is insufficient. External hard drives connected via USB do not offer enough online connectivity
for my needs. Therefore, I use NAS (Network-Attached Storage) for storage. NAS is essentially a computer
without a keyboard, mouse, or monitor, operated only through a network connection, running a special
operating system. My chosen NAS model is the Synology DS 718+. It contains two Western Digital hard drives,
each 6TB, specially designed for NAS with low energy consumption. I use these drives in RAID 0 mode. This
gives me a total disk capacity of 12 TB, equal to the sum of both drives, and operates quite fast as it
writes and reads from both drives simultaneously. (There are many different methods like RAID 1, 2, 3, etc.
for connecting multiple drives. I prefer 0.)

Synology DS 718+
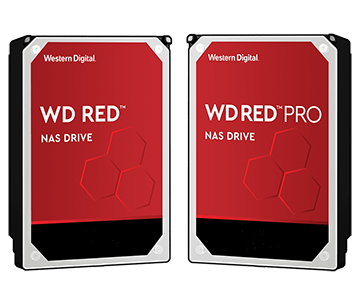
Western Digital 6 TB Red NAS Hard Drive
I connect the NAS device to my home modem via an Ethernet cable, thus
avoiding potential delays from Wifi. Once connected to the local network at home, I can access all my files
from any of my devices: iPhone, iPad, Android, Macbook, and PC. When you activate the AFP (Apple File
Protocol) service on the NAS, you can assign this drive as a separate drive on Mac computers. Similarly, by
activating the SMB (Samba) service, you can access your photos from your PC, for example, as a separate
drive named P:. This is a great convenience for me. To access from iOS and Android devices, you need to
install Synology's Drive app. Another feature provided by NAS is that you can make these services accessible
not only on the local network but also via the Internet. This means you can easily access your files from
your workplace or anywhere in the world. NAS provides a URL in the format https://%name%.synology.me for
accessing your system over the Internet. With Let's Encrypt integration, it creates a certificate for you,
making this access more secure via the SSL protocol. If you wish, you can open many services such as Web
server, FTP, SFTP, AFP, SMB for Internet access, and NAS does all the port forwarding configurations with
your modem on your behalf. Great convenience! On the other hand, I develop the website you are currently
visiting from A to Z myself. I can create a development and test environment for my website without needing
another PC by using services like MariaDB - MySQL, PHP, Apache Web Server, etc., which come pre-installed on
the NAS. When I open this web server to Internet access, I can modify and test the codes of my website from
anywhere.
Synology NAS - DSM Management Web Interface
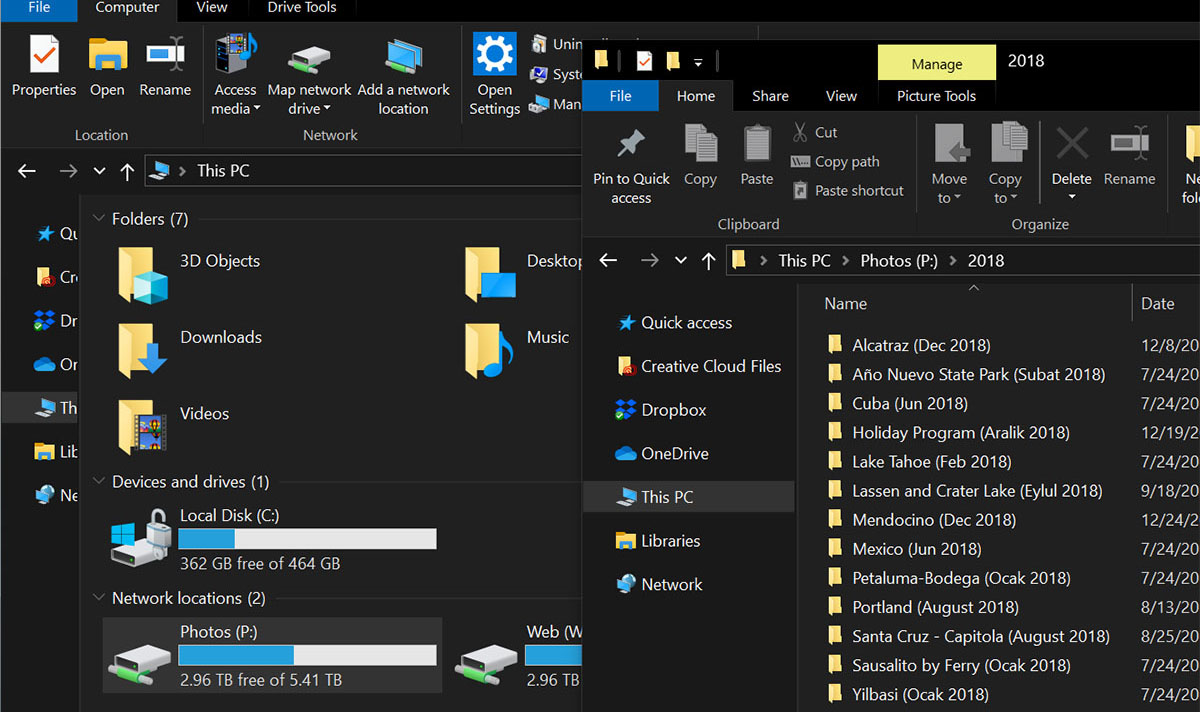
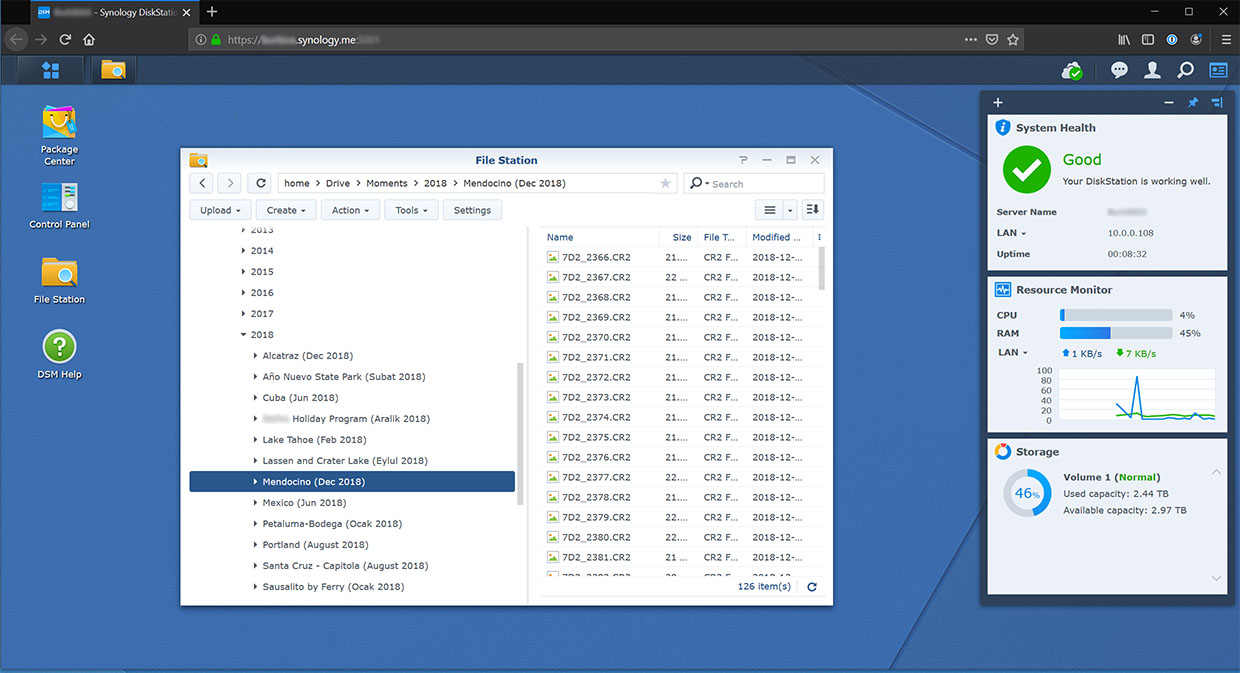
Access to the photo archive assigned as the P:\ drive from
Windows
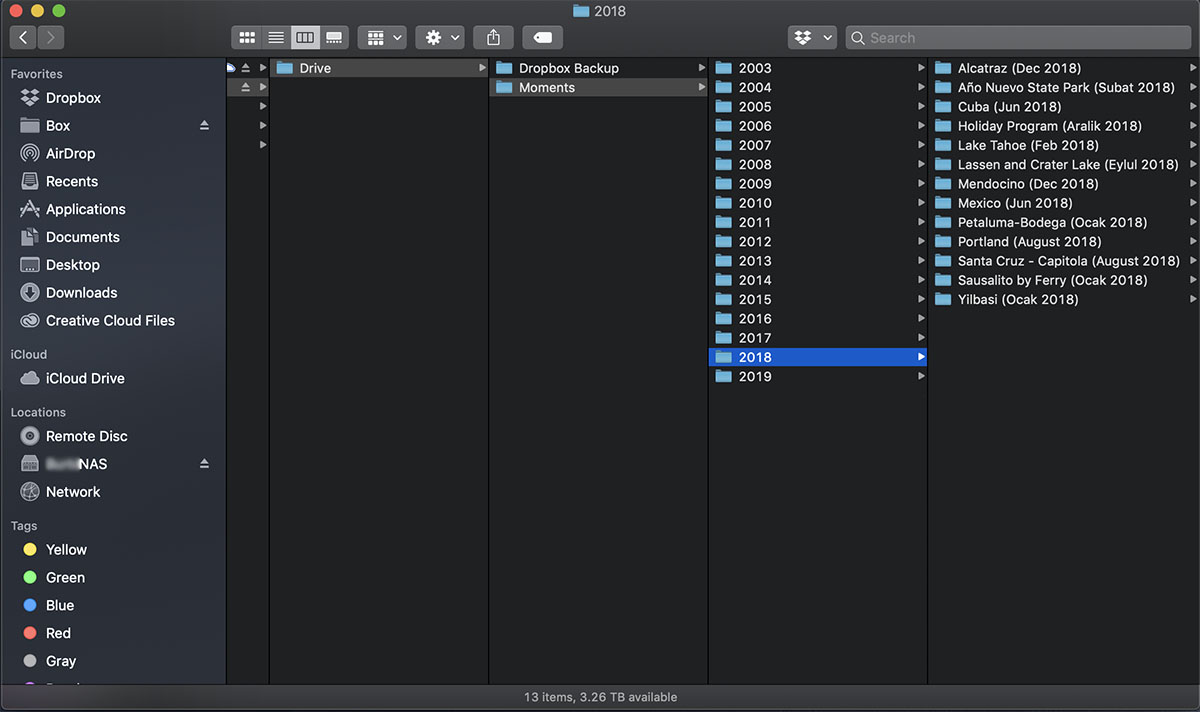
Accessing your archive from Mac computers through the
Internet using the external AFP service, visible within Finder.
As I mentioned above, I have my photo drive as a separate drive on both
my PC and Mac. I use two methods to transfer photos from my camera. If the number of files I'm transferring
is very few (max 2-3), I use my camera's Wifi to wirelessly transfer to a folder configured for FTP (File
Transfer Protocol) on my NAS drive. For this, your camera needs to support FTP. I don't even need to be at
home for this; as I mentioned in the previous paragraph, my FTP server is accessible from the Internet and
connecting is quite easy. However, since I shoot the files in RAW format, even transferring a single file
can take a long time. Therefore, when I need to transfer more photos, I remove the CF card from the camera
and transfer it to the NAS using the CF card reader on my computer, marked as P:. As soon as I transfer the
photos, my NAS device starts indexing them. However, since the photos are very large files, the processor of
the NAS device starts working very hard, and the transfer speed decreases. Alternatively, you can manually
stop the indexing process from the NAS DSM management screen at this moment. Although this indexing process
slows down the procedure, it actually does a great job because now I can search my photos through the
Synology Moments photo application. For example, if you have friends in the photo, it recognizes who they
are by their faces, or you can search by words like mountain, sea, forest. If you took the photo in San
Francisco, you can search by location. If you use Google Photos, you'll have a very similar experience,
making all your photos searchable. I find the Moments app very successful. The biggest difference from
Google Photos is undoubtedly privacy, as your photos are stored on the NAS device in your home, not on
Google's servers. You can use the Moments app on iOS and Android devices. The app shows all your photos as a
timeline based on years. Your entire archive is accessible from your mobile phone!
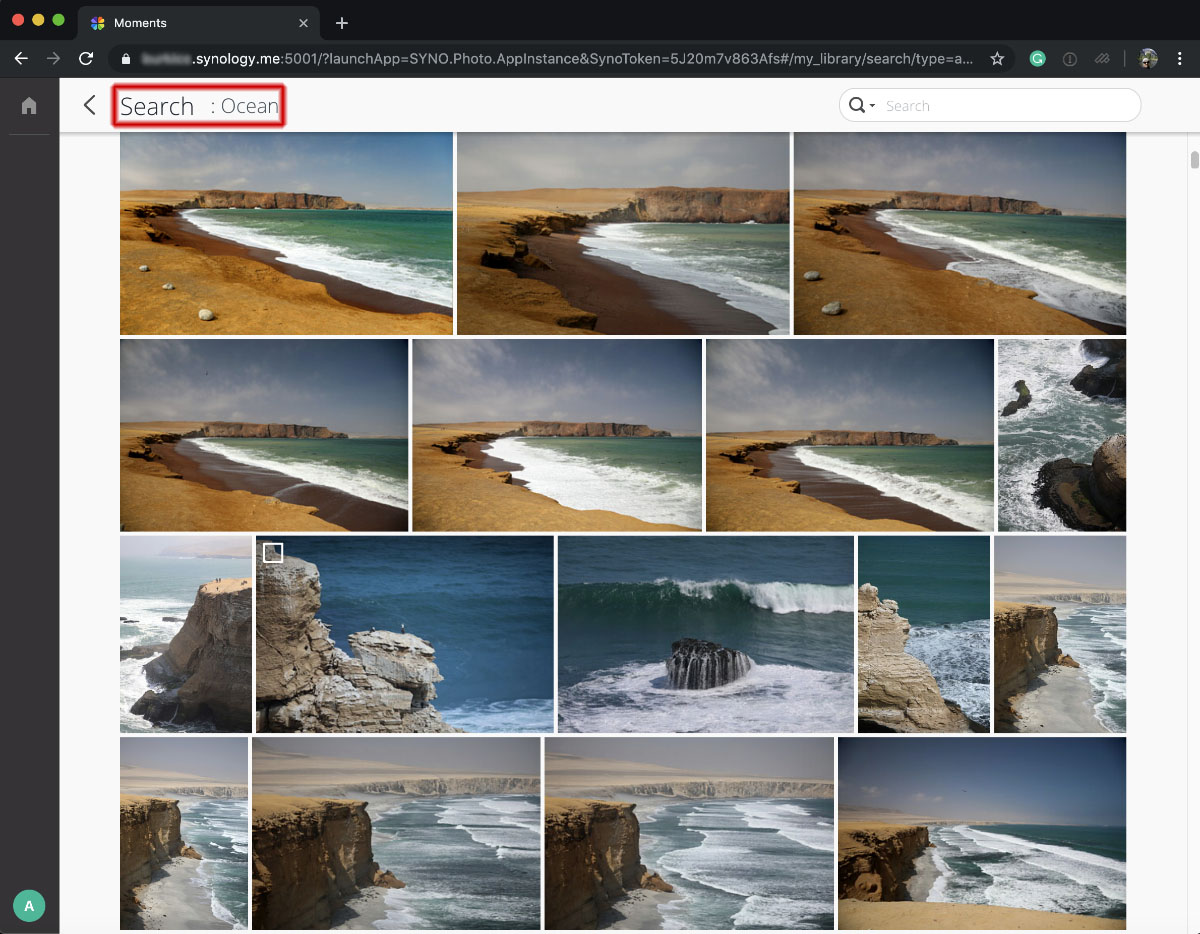
Searching for photos with the ocean in them using the
Synology Moments smart search function.
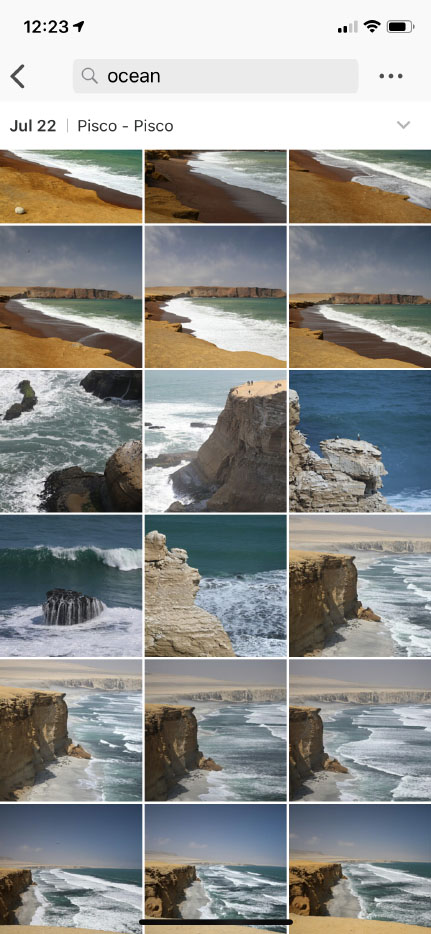
The same search performed from the Synology Moments iOS
app.
With Moments, you can access your archive from all your iOS and Android
devices, which is great. But what if you want to examine your photos on a large screen on your computer,
categorize the new photos you've taken, select your favorites, and rate them? You want to process them
quickly but professionally without transferring them to Photoshop. Which program will you use for this? For
many years, I used the Picasa program for this, but unfortunately, Google discontinued Picasa's desktop
applications after acquiring it, creating a significant software gap. After a long trial and error process,
I found the program I will use: Luminar, developed by a software company named Skylum! It has versions for
both Mac and PC, and it meets all my needs in every aspect, I definitely recommend it. Browsing your archive
and searching for photos is very similar to the experience in Picasa. Adobe has Lightroom for this purpose,
but I could never warm up to Lightroom. Luminar, on the other hand, won me over instantly and has become one
of my favorite software. The latest version is currently 4.1.0. For browsing my archive, it can show my
photos in the folder structure on the original disk as seen in the screenshot below, or it can automatically
create a breakdown by the date they were taken, as seen in the upper right. Similarly, I can filter them
based on a scale from 1 to 5, or whether I marked them as a favorite. I can sort the list by file type,
name, size, date taken. With these features, I can easily access any file in my photo archive, which reaches
hundreds of thousands.
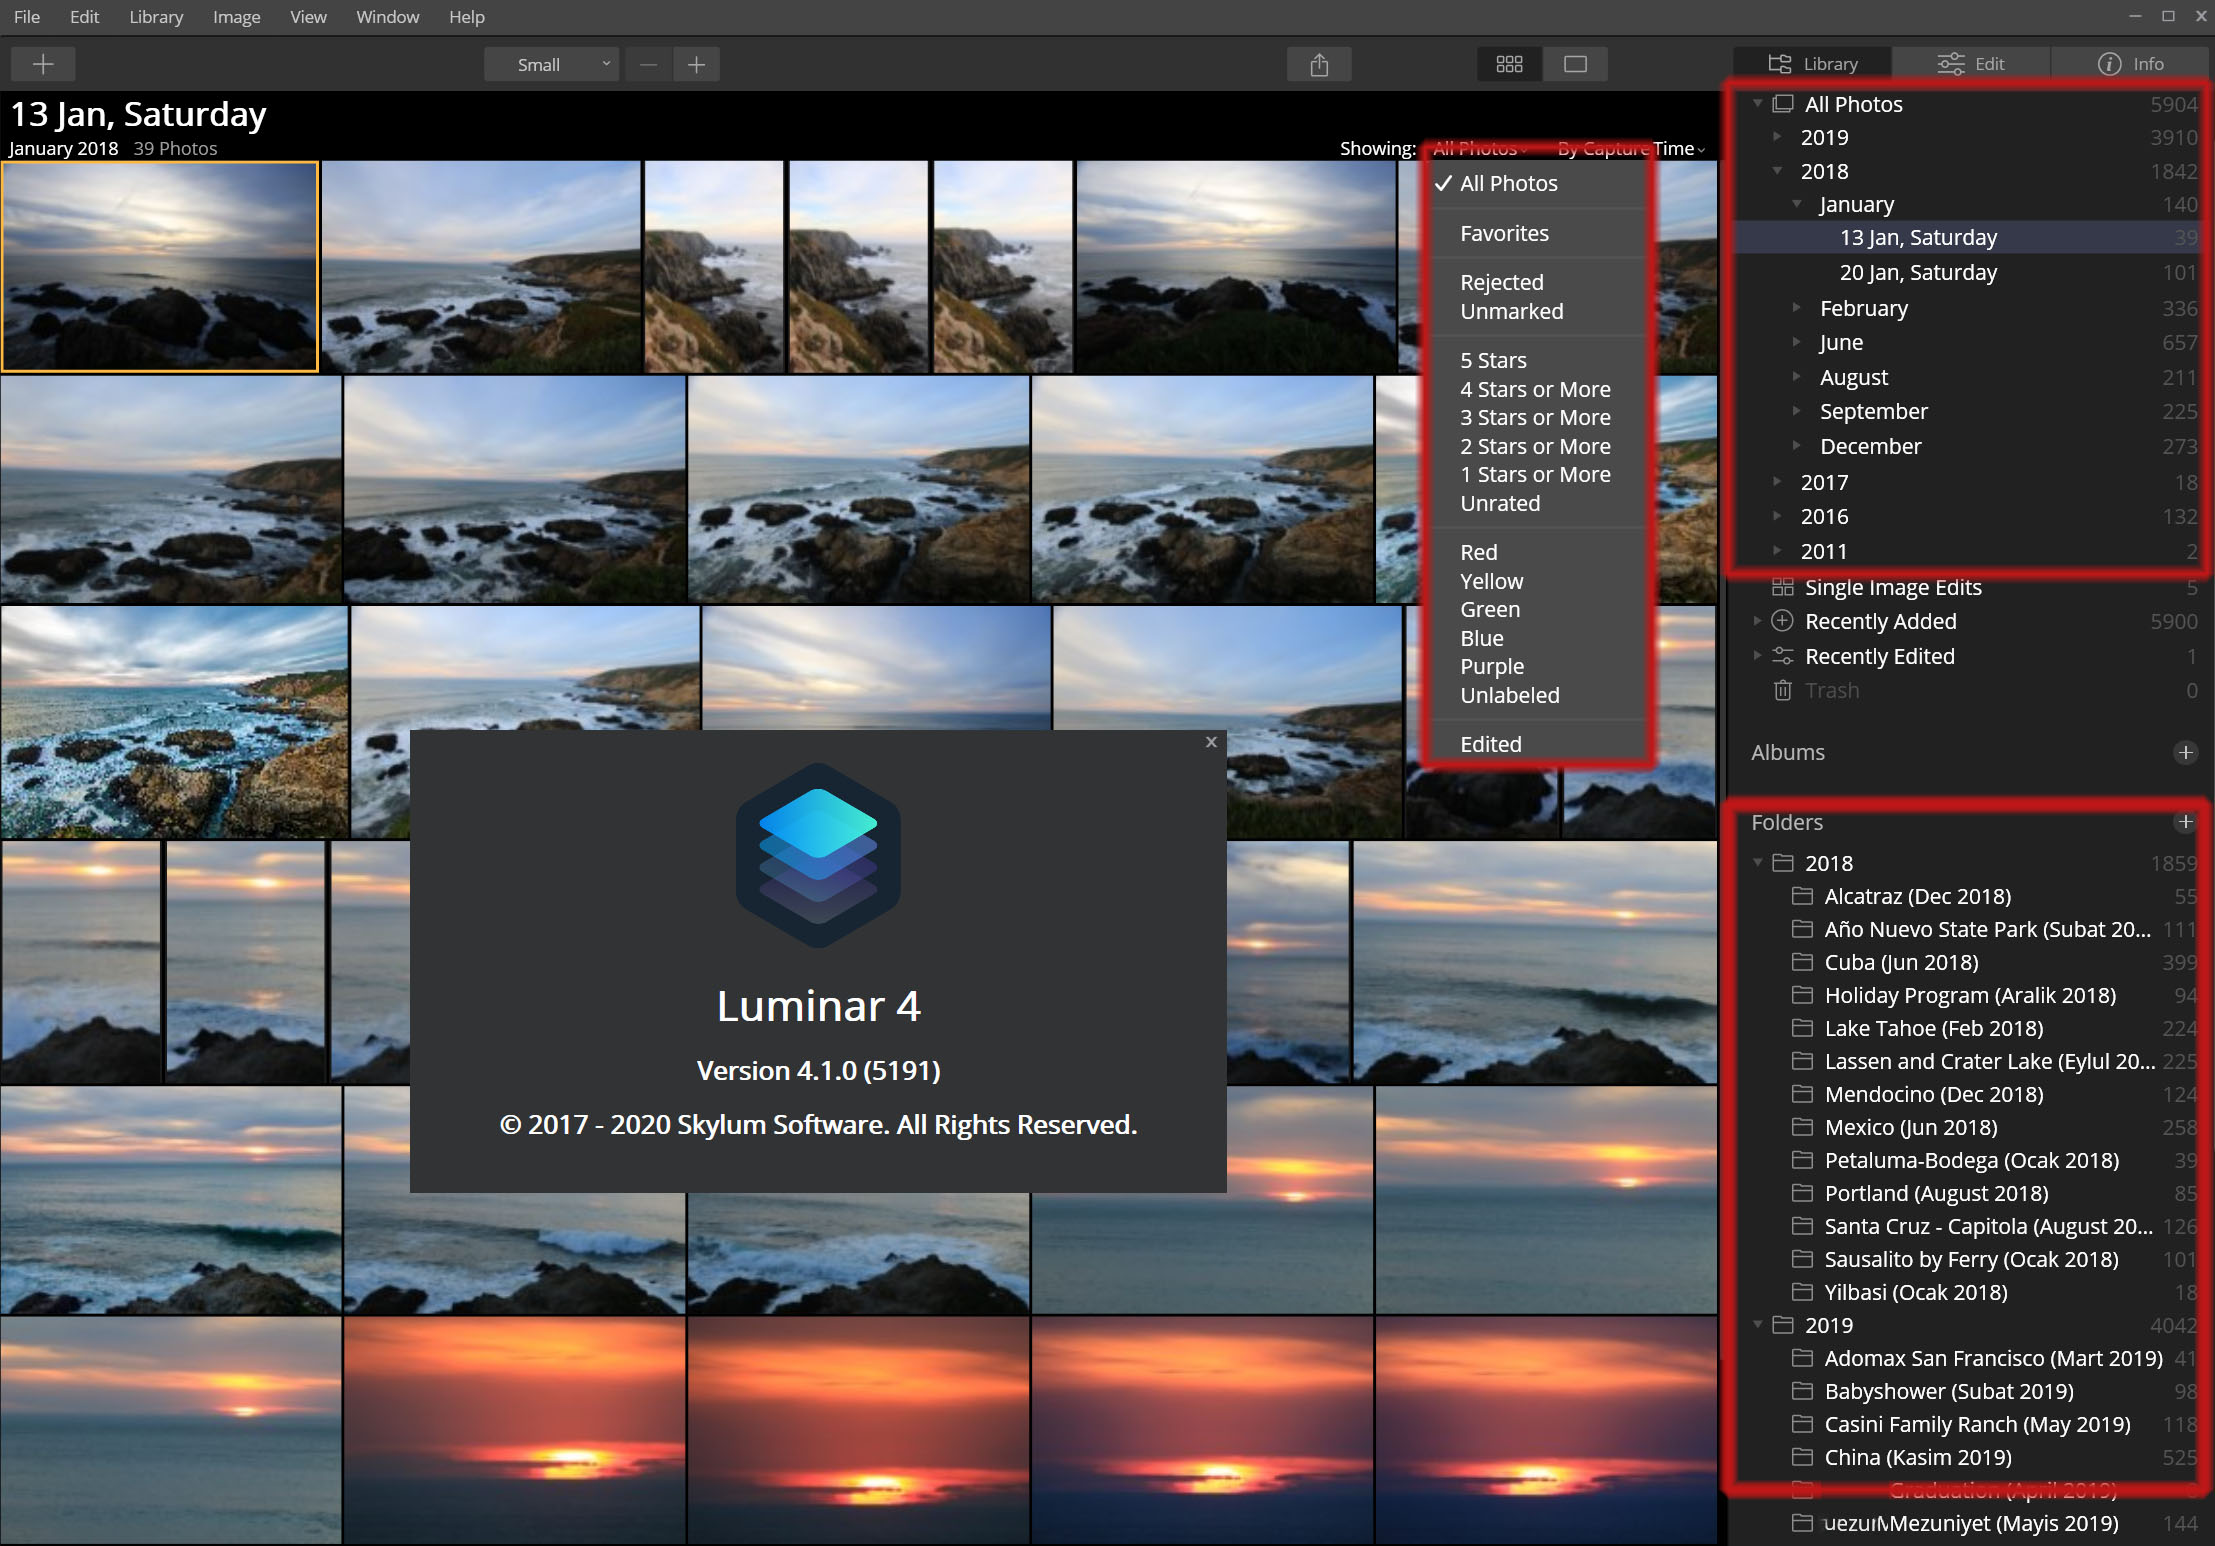
Luminar 4 - Library Mode
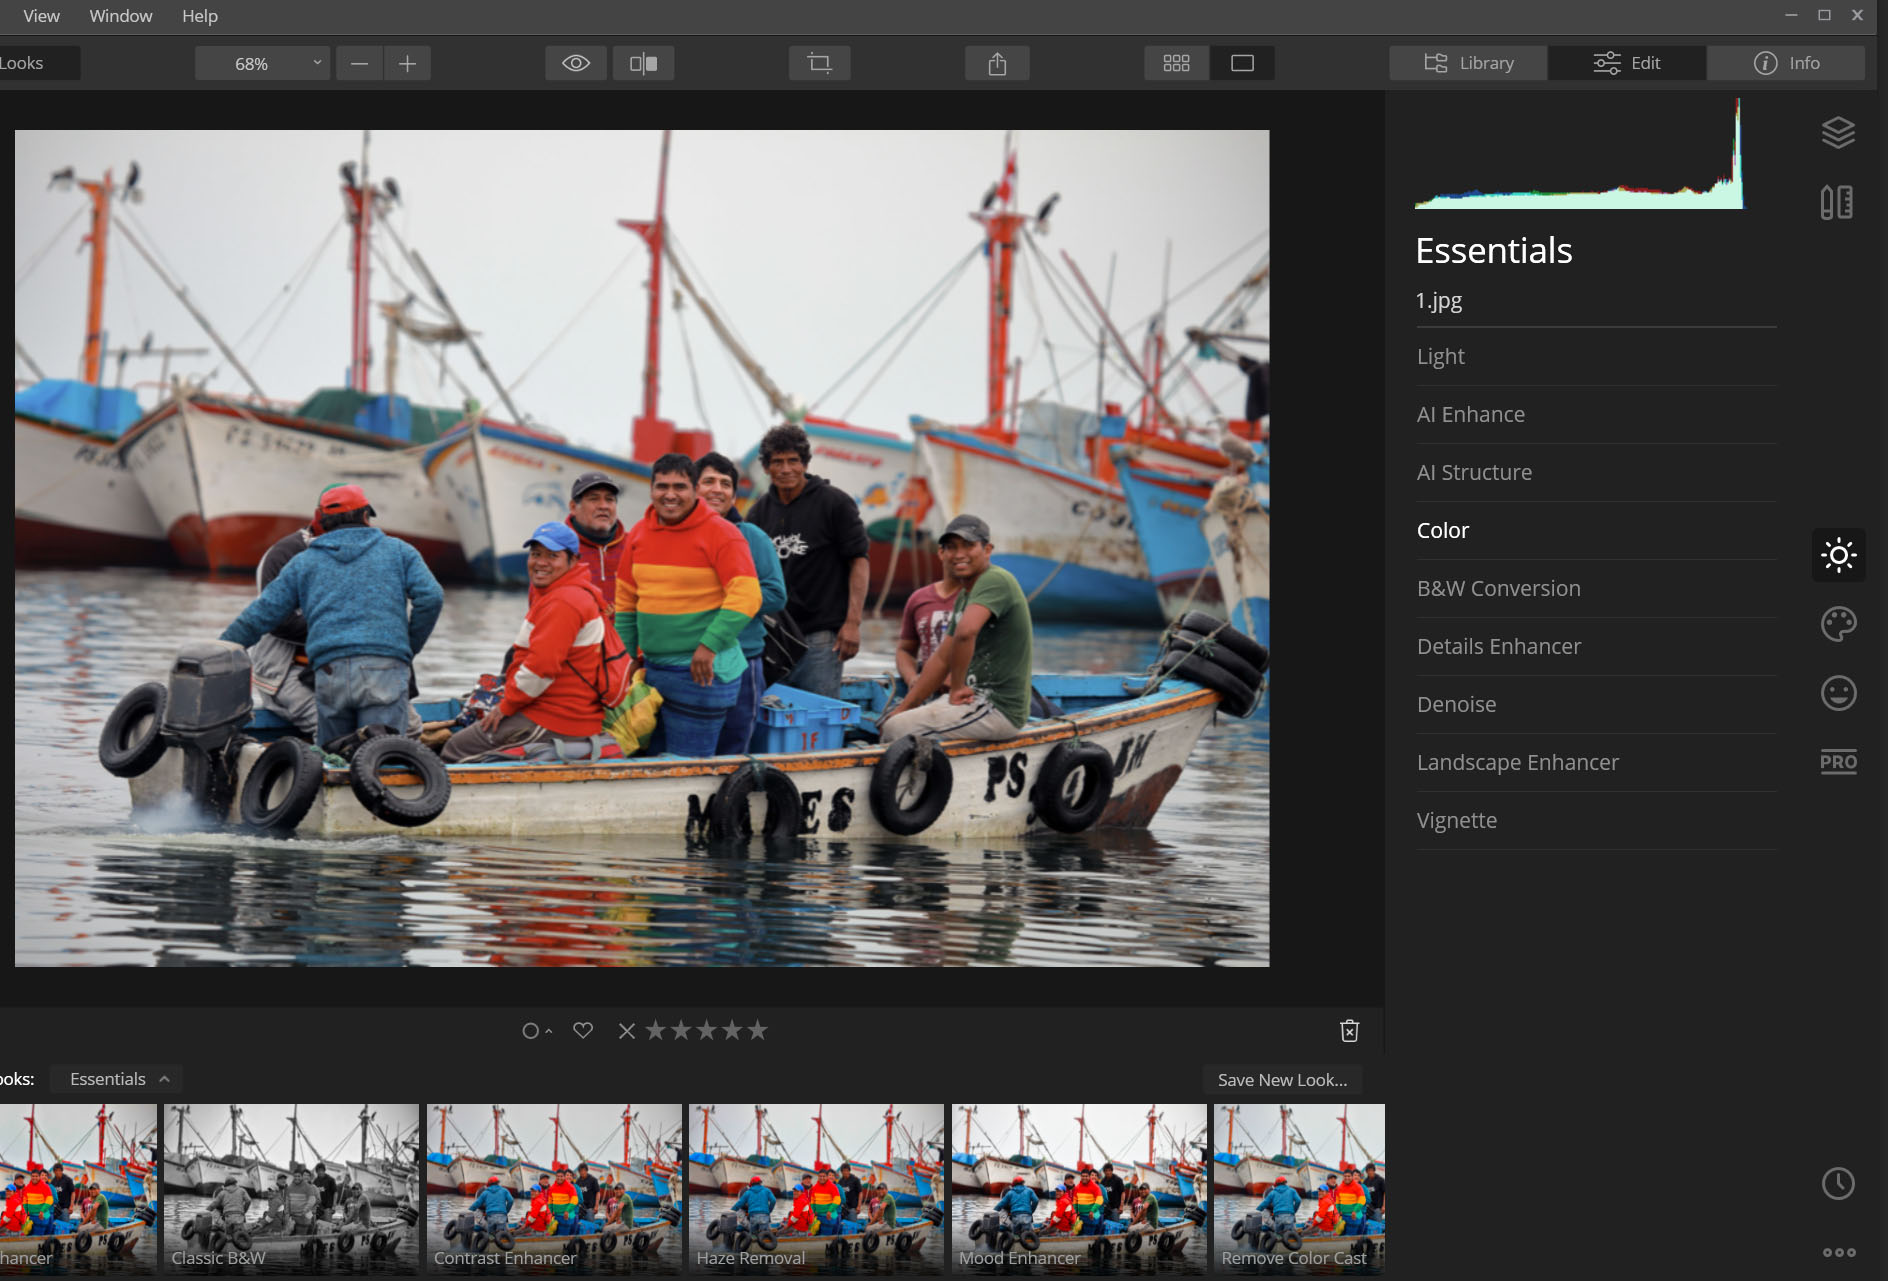
I've been using Photoshop for years to edit photos. However, if you
want to edit hundreds of photos in Photoshop, it really takes a long time. Luminar can make significant
changes to a photo very quickly. Especially when dealing with many files, this time-saving is substantial.
However, its editing capabilities are not as advanced as Adobe Photoshop. We don't expect them to be,
considering their price and experience. If the operation I will perform involves more complex steps like
many adjustment layers, masks, content-aware fill, I edit the photo with Photoshop. I am a customer of
Adobe's Photography Plan. I would say I am an intermediate expert in Photoshop and I define Photoshop as one
of the most successful software of all time. But if you want to get a pretty good photo by clicking a few
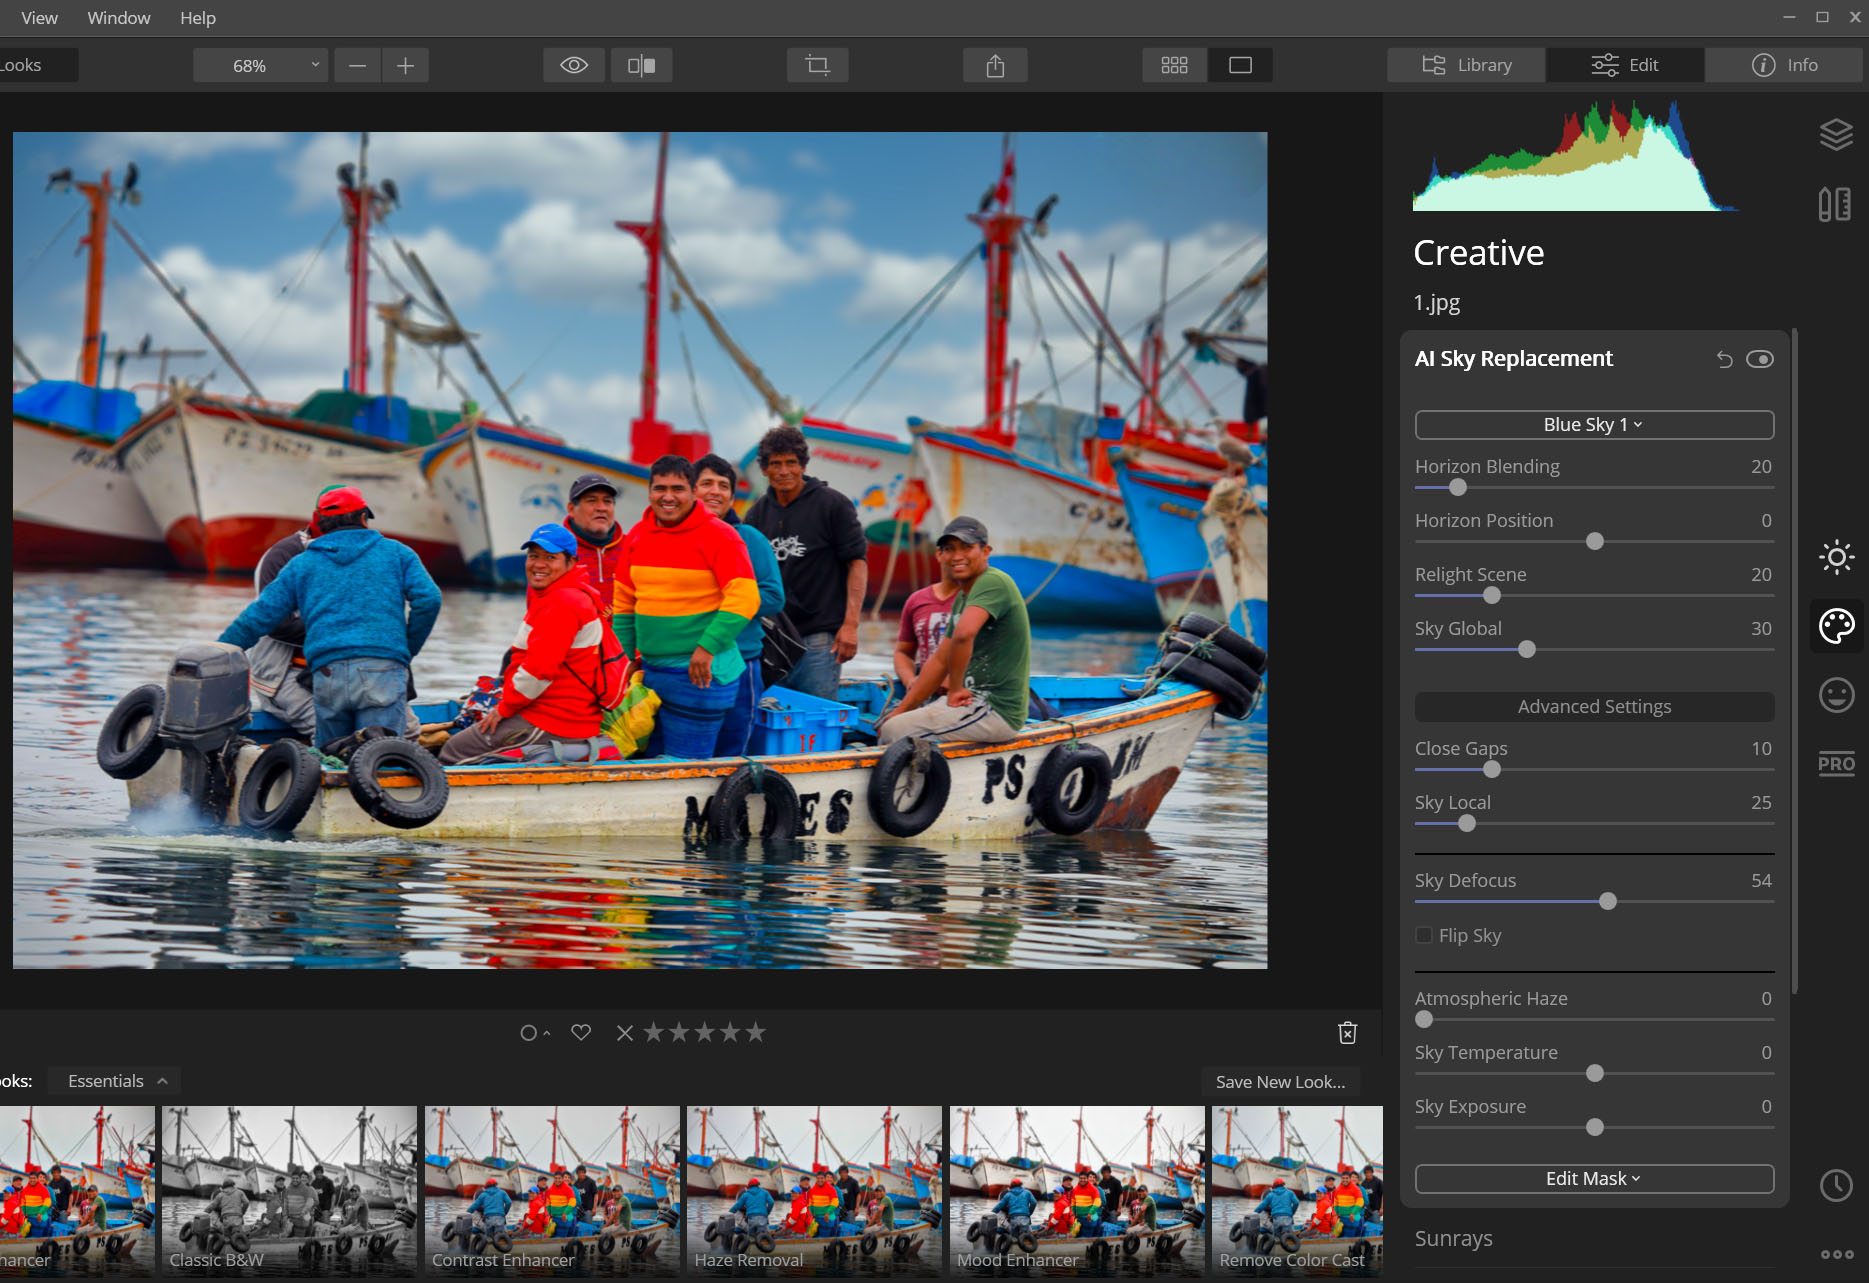
buttons, even if it's not perfect compared to the original, Luminar 4.1 creates wonders. Especially the AI
Image Enhancer and Sky Replacement functions deserve all kinds of praise. Image enhancement improves the
basic values of the photo like contrast, brightness, structure, color saturation, elevating the photo
instantly. Sky replacement, on the other hand, miraculously places any sky from the sky library that comes
with the program or that you can expand with additional packages into the photo. It automatically detects
the area where it will place the sky, handles all the masking, and adjusts the overall lighting of the photo
according to the selected sky. You can also use your own sky images. When you enter advanced settings, as I
demonstrate below, it even allows you to adjust the background bokeh if present. Truly a feature worth
taking your hat off to, justifying the cost of the program on its own.
An unedited photo.
The same photo with AI Image Enhancement and Sky
Replacement done in Luminar.
The topic I'd like to touch on last is backup. I believe that even if we use NAS drives, we still need to
back up our stored files elsewhere, and this is crucial. What if one of the disks you use inside your NAS
fails? - which, believe me, is not that difficult. Or if you accidentally delete files. That's when you must
have a backup. Otherwise, you might lose all your photos. However, if you have a manual backup process that
you can't automate, you're still at risk. When was the last time you backed up? Cloud Computing can be a
solution in this regard. But still, you need to find a way to automatically back up your photos. This is
where Synology NAS comes into play again. Thanks to the Synology Cloud Sync application, I configured it
once, and any changes on my drive are automatically synchronized with the cloud a few seconds later. So, a
copy of my NAS drive is synchronized with a cloud server that only I can access. After much research and
trial and error, I decided to use BackBlaze Cloud for this. This service works quite fast and is also the
cheapest solution compared to others. Approximately 910 GB containing 130,000 photos of mine are backed up
on BackBlaze, and I pay a bill ranging from $5 to $6 per month for this size.
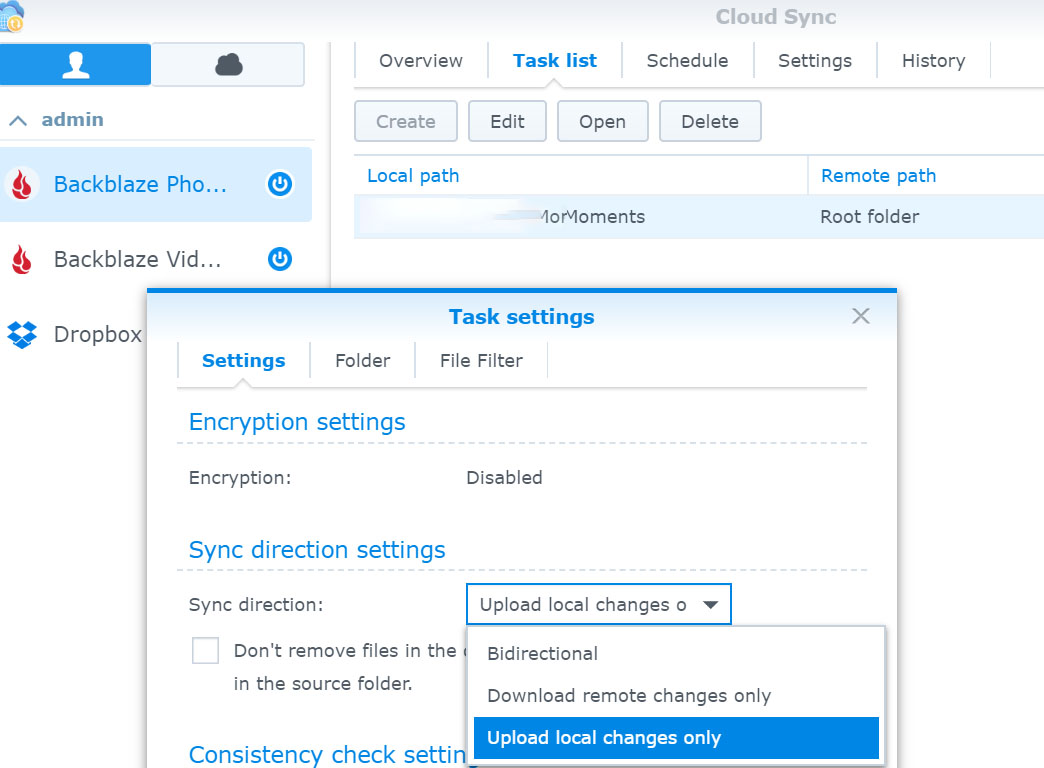
Backup settings in the Cloud Sync program on Synology NAS
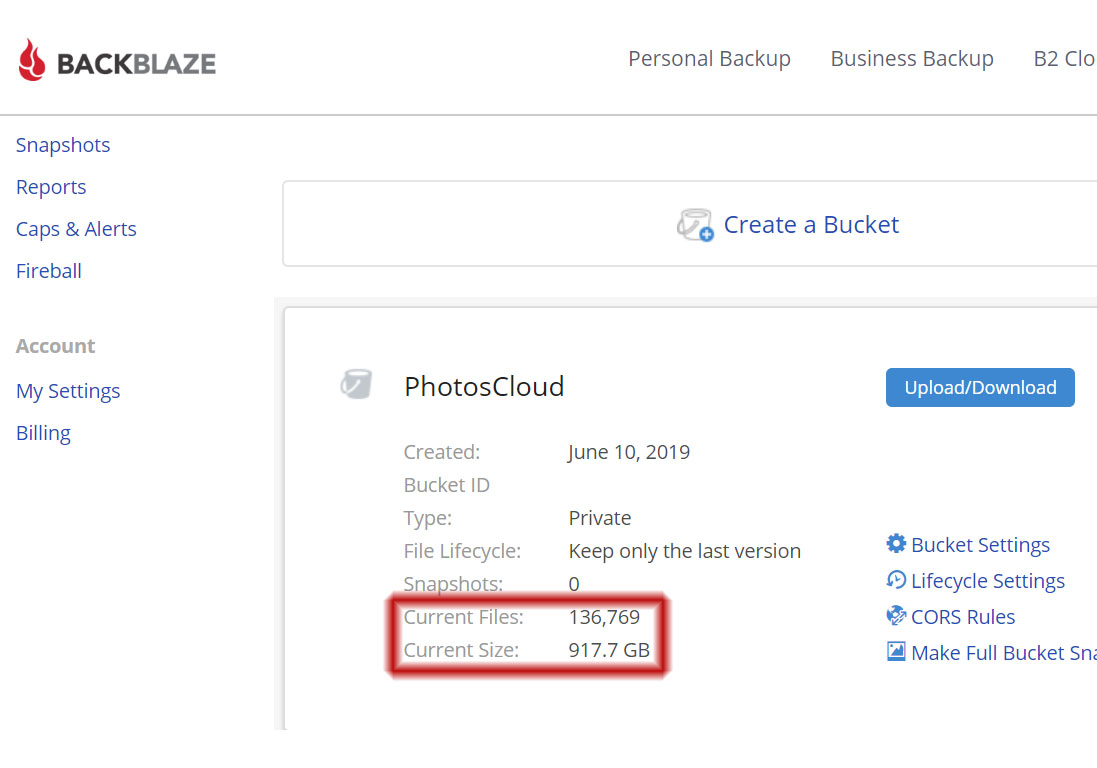
My photo archive in the Backblaze cloud backup system
?>&description=)