My Photography Workflow and The Software I Use

Introduction
Photographers often finish a day of shooting with hundreds of images, and after longer trips, that number can easily reach into the thousands. All of these photos need to be transferred to the computer, organized so they are easy to find later, shortlisted, marked for editing, backed up securely, and eventually published or archived. This entire process is known as a “photography workflow,” and it plays a key role in keeping large photo libraries manageable.
In reality, the workflow actually starts even before pressing the shutter, beginning with choosing the right camera settings, selecting lenses, and thinking about how the photos will be used. As technology, software, and camera systems continue to evolve, every photographer’s workflow naturally changes and adapts over time. There is no single correct way to do it. Each photographer develops a method that fits their style, habits, and goals. In this article, I will walk you through the workflow I personally use and explain how I manage my photos from the moment I take them until they are fully edited and ready to share.
Camera Settings: RAW vs JPEG
Since I started photography as a hobby in 2004, I have taken thousands of photos. As of writing this article, the count has reached 118,664, and I continue to add more each day. I prefer shooting in RAW format for the greater editing flexibility it offers. In this case, a single RAW file taken with my current Canon 5D Mark IV camera is about 40 MB in size. The alternative is shooting in JPEG format, which reduces file size to around 8-10 MB, but significantly limits post-editing capabilities. When shooting in JPEG, the camera processes the photo for you based on the selected settings, converting it from RAW to JPEG, whereas RAW files must be processed with software, not used in their current state. This also impacts the workflow. Thus, the decision to shoot in RAW or JPEG shapes the workflow.
 Unprocessed RAW: Dark areas and lost details
 After RAW processing: Recovered details and vibrant colors
Photo Storage with NAS
Storing photos on a standard desktop or laptop hard drive is usually not enough for a serious photography archive. External USB drives also fall short for my needs, especially when it comes to reliable access and online connectivity. Because of this, I prefer to store my photos on a NAS (Network Attached Storage) device. A NAS is basically a small computer designed only for storage. It has no keyboard, mouse, or monitor, and it is managed entirely over the network using a dedicated operating system.
The model I use is the Synology DS718+. Inside the unit, I have two Western Digital hard drives, each with a capacity of 6 TB. These drives are specifically designed for NAS environments and are optimized for low power consumption and long-term reliability. I configured the drives in RAID 0 mode. This setup combines the capacity of both drives, giving me a total of 12 TB of storage. It also increases performance, since data is written to and read from both drives at the same time. There are many RAID configurations available, such as RAID 1, 2, and 3, but RAID 0 is the one I personally prefer for my workflow needs.
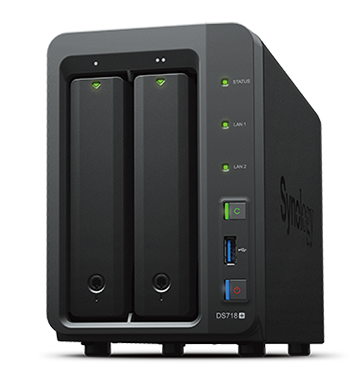 Synology DS 718+: My photo storage solution
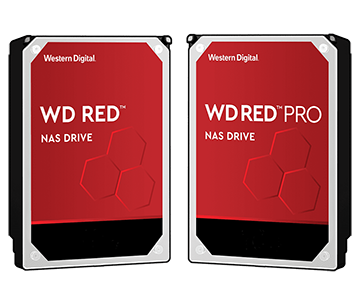 WD Red 6TB: Reliable NAS storage
I connect my NAS device to my home modem using an Ethernet cable so I can avoid the potential delays that sometimes occur with Wi-Fi. Once the NAS is on my local network, I am able to access all of my files from any of my devices, including my iPhone, iPad, Android phone, MacBook, and Windows PC. When the AFP (Apple File Protocol) service is enabled on the NAS, it can appear on a Mac as if it were a separate local drive. In the same way, when the SMB (Samba) service is enabled, the NAS can appear on a Windows computer as a dedicated drive, such as drive P. This makes file access extremely convenient in daily use.
To access the NAS from iOS and Android devices, it is necessary to install Synology’s Drive app. Another important benefit of a NAS system is that it is not limited to your local home network. You can also make your files available securely over the Internet, which means you can reach your photo library from your workplace or from anywhere in the world. Synology provides a URL in the format https://%name%.synology.me for remote access. With built-in Let’s Encrypt integration, an SSL certificate is automatically created so that your connection remains encrypted and secure. If you prefer, you can also enable services such as Web Server, FTP, SFTP, AFP, and SMB for remote access, and the NAS can automatically configure the necessary port forwarding settings on your modem. This is a huge convenience.
I also develop the website you are currently visiting entirely on my own. Thanks to the included services such as MariaDB, MySQL, PHP, and the Apache Web Server, I can create a complete development and testing environment directly on the NAS without needing a separate computer. When I enable Internet access for this web server, I am able to update and test my website code from anywhere, which gives me great flexibility in managing and improving my site.
Transferring Photos to Storage
As I mentioned earlier, my photo archive appears as a separate drive on both my PC and my Mac. I usually use two different methods to transfer photos from my camera to this drive. If I only need to transfer a small number of files, usually two or three at most, I use my camera’s built-in Wi-Fi feature to send the photos wirelessly to a folder on my NAS that I have configured for FTP (File Transfer Protocol). Your camera needs to support FTP for this to work. The nice part is that I do not even need to be at home, because my FTP server is accessible over the Internet, so connecting remotely is very easy.
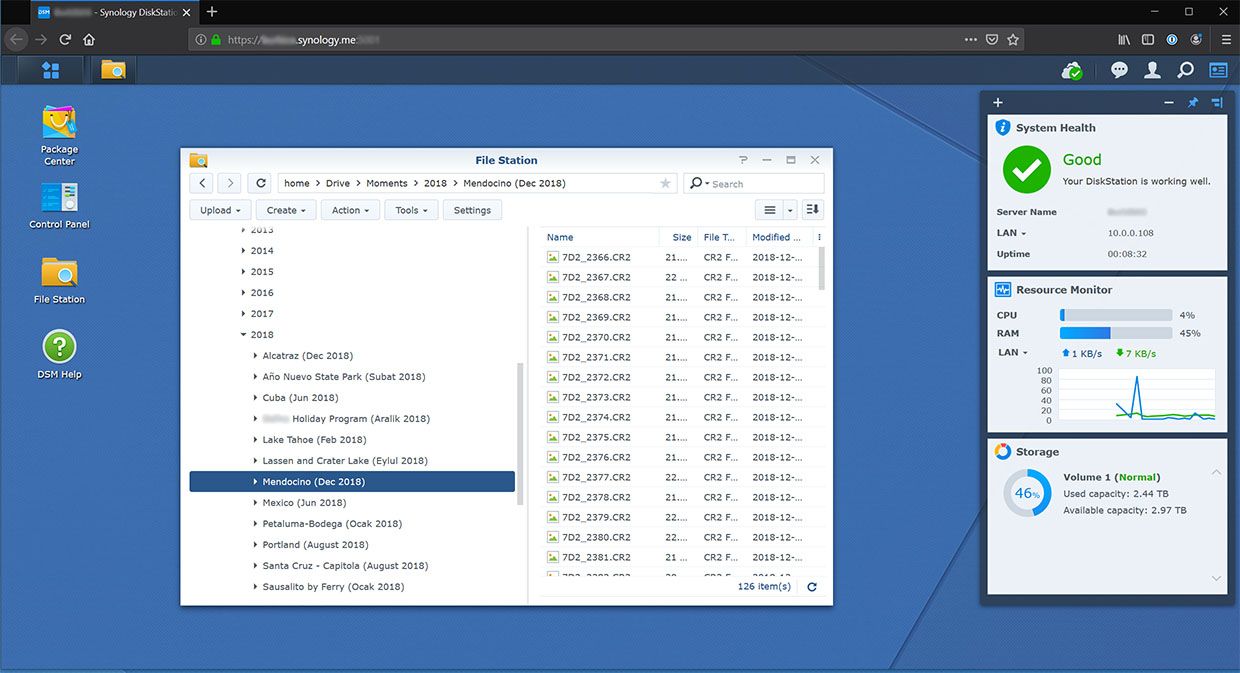
However, since I always shoot in RAW format, each file is quite large. Even transferring a single RAW file over Wi-Fi can take a noticeable amount of time. For larger batches of photos, I remove the CF card from the camera and use the CF card reader on my computer to copy the images directly to the NAS, which appears as drive P on my PC. As soon as the photos are transferred, the NAS automatically begins indexing them. Because RAW files are large, this process uses a lot of processing power and may temporarily slow down transfer speeds. If necessary, it is possible to manually pause the indexing process from the NAS DSM management panel.
 Photo archive as P: drive in Windows
 Remote NAS access from Mac
AI Search Over Your Photos
Although the indexing process takes some time, it becomes incredibly valuable once it is complete. After indexing finishes, I can search my entire photo archive using the Synology Moments app. The system is able to recognize faces and automatically group photos of the same people. You can also search using simple keywords such as mountain, sea, or forest. If a photo was taken in San Francisco, you can even search by location and instantly find it. If you have used Google Photos before, the experience will feel very familiar, because your entire archive becomes searchable and easy to browse. I think the Synology Moments app works extremely well. For me, the biggest advantage over Google Photos is privacy, since every image is stored securely on your own NAS device at home instead of on a third-party cloud server.
Moments is available for both iOS and Android devices. The app automatically organizes your photos into a clear timeline based on year, which makes navigating your archive very intuitive. As a result, your complete photo library is always accessible from your mobile phone, allowing you to browse, search, and enjoy your photos wherever you are.
 Moments smart search: Find photos by content
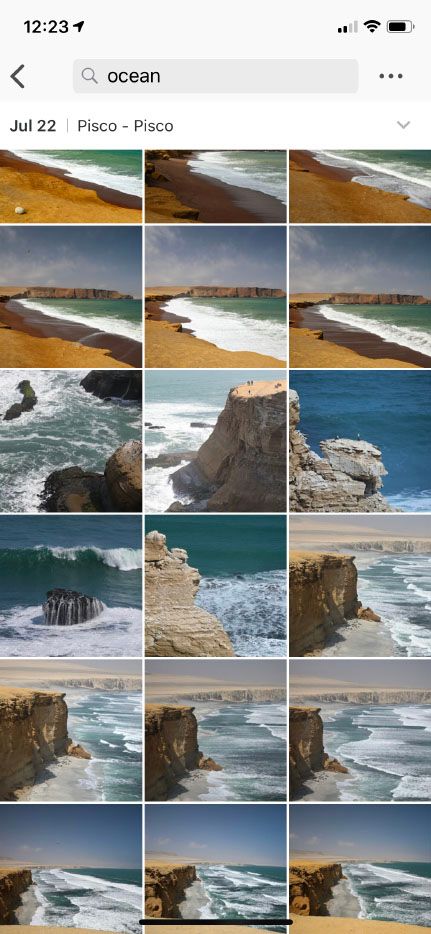 Moments iOS: Your archive on mobile
Browsing and Organizing Your Archive
With Synology Moments, you can access your entire photo archive from your iOS and Android devices, which is incredibly convenient. However, sometimes you want to review your photos on a larger computer screen, organize newly imported images, choose your favorites, and rate them. You may also want to process them quickly in a professional way without moving everything into Photoshop. So the question becomes: which software should you use for this?
For many years, I relied on Picasa. Unfortunately, after Google acquired it, they discontinued the desktop version, which left a serious gap in the market. After a long period of trial and error, I finally found the software that works perfectly for my needs: Luminar, developed by Skylum. It is available for both Mac and Windows, and it meets all of my requirements so well that I can confidently recommend it. The browsing and search experience feels very similar to what Picasa once offered. Adobe Lightroom is also designed for this purpose, but I personally never felt comfortable using it. Luminar, on the other hand, impressed me immediately and has become one of my favorite tools.
The current version I use is 4.1.0. When browsing my archive, Luminar can display my photos using the existing folder structure on the NAS drive, or it can automatically group them by capture date. I can also filter images by rating from one to five stars or by marking them as favorites. Sorting options include file type, file name, size, and the date the photo was taken. With these features, navigating my photo archive, which now contains hundreds of thousands of images, becomes fast, organized, and incredibly efficient.

Photo Editing Software
I have been using Photoshop for many years to edit my photos. However, when you need to work on hundreds of images, editing each one in Photoshop can take a very long time. This is where Luminar really shines. It allows you to make powerful adjustments very quickly, which saves an incredible amount of time when you are working with large batches of files. Of course, its editing capabilities are not as advanced as Adobe Photoshop, and that is completely expected given the difference in price and purpose.
Whenever I need to perform more complex edits, such as working with multiple adjustment layers, masks, or tools like content aware fill, I still turn to Photoshop. I am a subscriber to Adobe’s Photography Plan and would describe myself as an intermediate level Photoshop user. In my opinion, Photoshop is one of the greatest software products ever created. But if the goal is to create a really good looking image with just a few clicks, even if it is not perfect compared to the original, Luminar 4.1 produces impressive results.
Two features in particular deserve a lot of praise: the AI Image Enhancer and the Sky Replacement tool. The AI Image Enhancer optimizes important visual elements such as contrast, brightness, color saturation, and overall structure, giving the photo a much stronger look instantly. The Sky Replacement tool is almost magical. It automatically detects the sky area in your photo and replaces it with any sky from the built-in library, or with one of your own images. The software handles all of the masking and even adjusts the lighting of the scene to match the new sky. In the advanced options, you can fine tune details, and even adjust background blur if needed. This single feature alone almost justifies the price of the program in my opinion.
 Before: Original unedited photo
 After: AI enhanced with new sky
Cloud Backup Strategy
The final and perhaps most important topic is backup. Even if you store your photos on a NAS drive, I strongly believe that you should still create at least one additional backup elsewhere. This is absolutely essential, because hard drives do fail and accidental file deletion can happen at any time. Without a proper backup strategy, you risk losing your entire photo archive.
In the photography and IT world, there is a widely accepted best practice known as the 3-2-1 backup rule. It is very simple to remember:
You should have 3 copies of your data, stored on 2 different types of storage media, with 1 copy kept off-site in a different physical location.
In other words, you have your main working copy, a local backup, and a separate copy stored somewhere else. This protects you not only from drive failure or user error, but also from theft, fire, or other disasters.
If your backup process is manual and depends on you remembering to run it, you are still at risk. It is easy to forget or postpone backups. Cloud storage helps solve this problem because the process can run automatically in the background.
This is where Synology NAS becomes extremely useful. Using the Synology Cloud Sync application, I configured everything once, and now any change made on my NAS is automatically synchronized with the cloud within seconds. That means a complete copy of my archive is stored securely on a remote cloud server that only I can access, fulfilling the “one off-site copy” rule.
After a lot of research and real-world testing, I chose Backblaze Cloud as my off-site backup provider. It is fast, reliable, and very affordable compared to many alternatives. At the moment, around 910 GB of my archive, including approximately 130,000 photos, is stored on Backblaze, and I pay about 5 to 6 dollars per month. For me, that is a small price to pay for complete peace of mind.
With this approach, I am very close to fully following the 3-2-1 backup strategy, and I know that my photography archive is protected as safely as possible.
 Cloud Sync: Automatic backup configuration
 Backblaze: 130,000+ photos safely backed up
Conclusion
In summary, a thoughtful and reliable photography workflow is just as important as the photos you capture. From efficient file transfer and smart organization to powerful editing and a robust backup strategy based on the 3-2-1 rule, each step helps ensure that your work remains accessible, safe, and easy to manage. Whether you are shooting casually or professionally, building a workflow that fits your needs will save you time and give you peace of mind as your photo archive continues to grow.
Frequently Asked Questions
Should I shoot in RAW or JPEG format?
What is a NAS and why use it for photo storage?
What is RAID 0 and is it safe for photo storage?
How can I transfer photos from my camera to NAS?
What is Synology Moments and how does it work?
What software is best for browsing large photo archives?
When should I use Luminar vs Photoshop for editing?
What is AI Sky Replacement in Luminar?
Why is cloud backup important for photographers?
What is Backblaze B2 and how much does it cost?
Keep exploring
Travel Guides
Day-by-day photographic guides with maps, gear notes, and the photos shot along the way.
Photo Galleries
1,300+ travel photos from 50 countries, organized by destination with EXIF and GPS.
About the Photographer
Years behind the lens, gear philosophy, and the story behind the portfolio.
Get in Touch
Questions about prints, licensing, or a shoot? Reach out and start a conversation.